Not all processes that at a given time consume many resources on macOS are suspected to be viruses or malware. This is also the case with the process UVFSService which we sometimes see with a high consumption of CPU resources in Activity Monitor. Let's see what it is UVFSService and why it uses large CPU resources at some times.

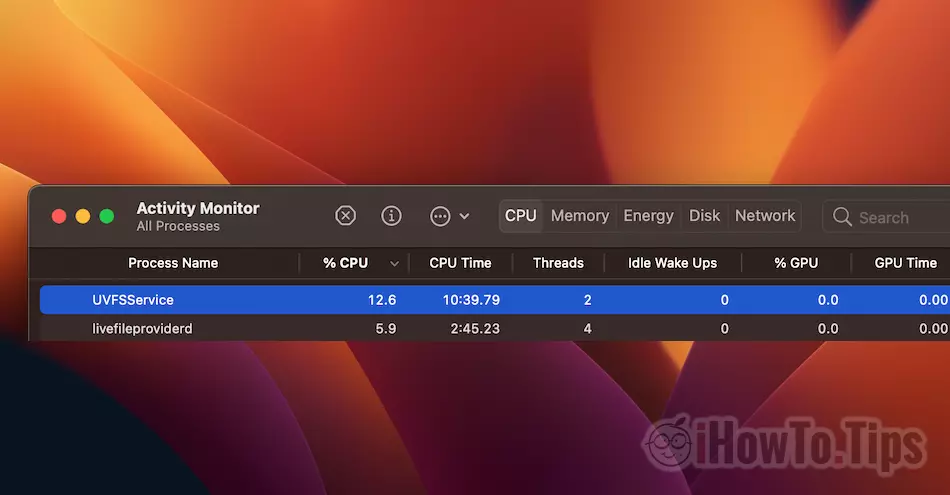
At the time I made this screenshot UVFSService it only consumes 12.6% CPU, but it had many moments when it reached almost 50% consumption. Quite large for a process, which is why many users, if they cannot identify it with an open application at that moment, may confuse it with a virus running malicious tasks.
The good news is that UVFSService it's not a virus, it's actually a process of macOS which performs very useful tasks. Despite the fact that often, the consumption of CPU resources leads to excessive heating a Mac or MacBook.
Table of Contents
What is a UVFSService and why it uses high CPU resources on macOS
UVFSService it is actually service of process UVFS which, according to everyone's understanding, mounts the files on the user's hard drive. A pseudo file system that sends requests to system files with user-level file read and write operations.
When on the storage medium of Mac (hard disk) many files were copied in a very short time, the process UVFSService will work for a while until they are indexed in Spotlight (the search system of macOS).
Another cause of which UVFSService consumes a lot of CPU resources, it is trying to read the files of another operating system installed with Boot Camp.
If on a MacBook or Mac you have installed for example Windows 11, when you are on macOS, the trial UVFSService it will try to index files that do not belong to the system it belongs to. Files that have other characteristics and permissions. For this reason, the process UVFSService it will use a lot of CPU resources.
The best solution is to exclude bootcamp from Spotlight Search. Anyway, those files on the partition Windows will not be indexed and displayed in the search results from macOS.
After you find out what it is UVFSService and why it uses high CPU resources on macOS, you must exclude the Bootcamp partition (Windows) of Spotlight. Thus the files Windows will no longer be indexed on macOS.
How do we exclude the Bootcamp partition (Windows) of Spotlight Search
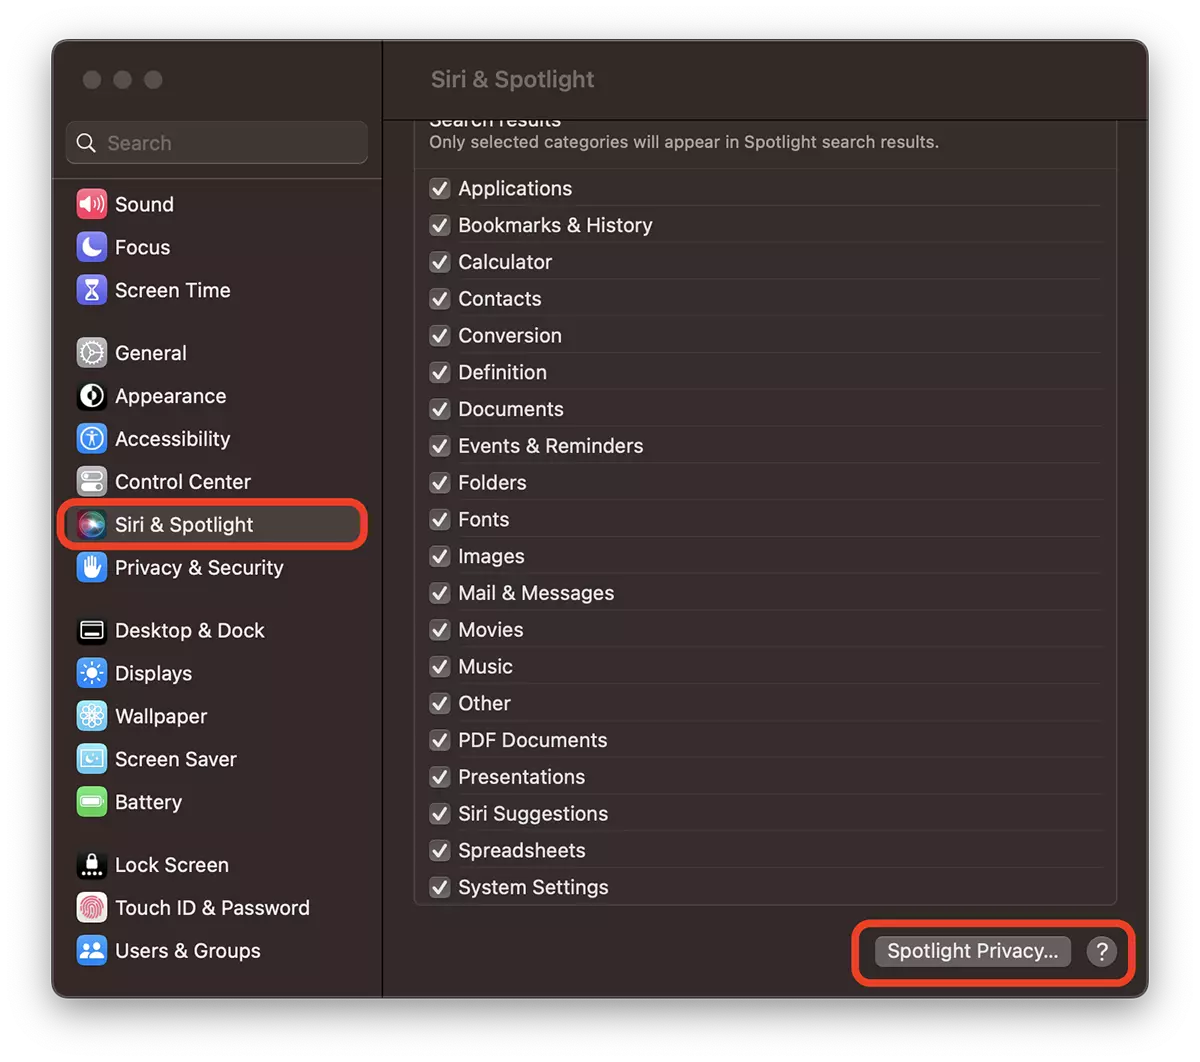
1. You open System Settings and go to Siri & Spotlight, then at the bottom at Spotlight Privacy.
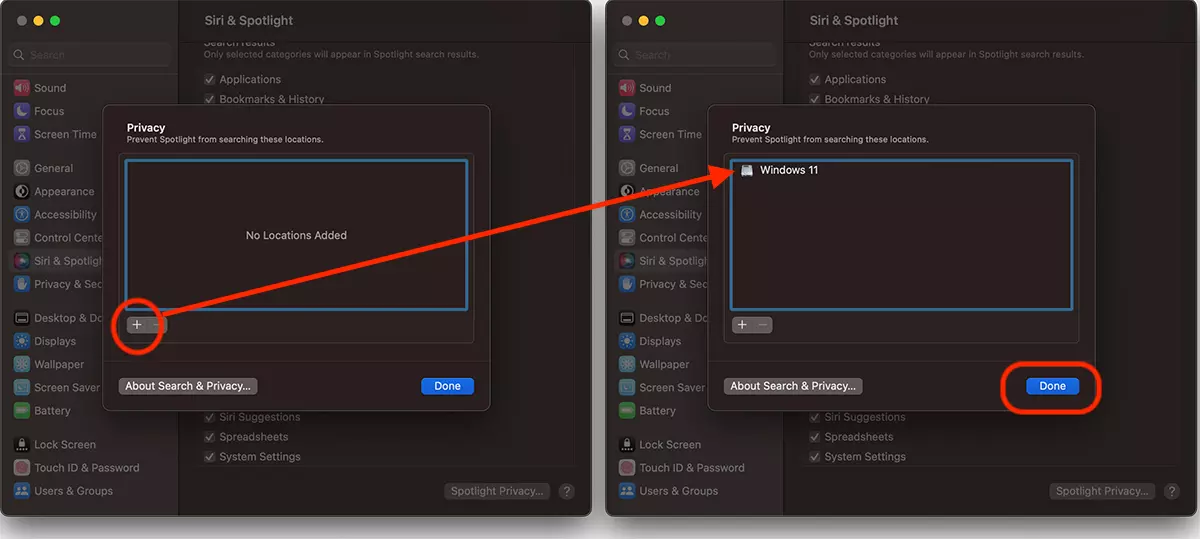
2. In the box that opens, click on the plus sign (+) and add the Bootcamp partition. (renamed Windows 11 in my case). Click Done.
After this step you will see that the process UVFSService it will not consume much CPU resources anymore.
In very rare cases, the high consumption of CPU resources al UVFSService it can be caused by hardware problems of the storage medium. If the performance of the hard disk is low, corrupt files may appear on it UVFSService cannot interpret them.


This website info is great! I came here looking for help with the UVFFService slowdown, and the fix given here worked (I have a Bootcamp partition for Win10, and Mac OS 12.6.2).
So thanks a lot!
Welcome! 😊