If you’re planning to give up your old iPhone and sell or give it to someone else, simply resetting the device is not enough. Before handing it over, you need to remove the iPhone from your Apple account so it can be used by the new owner. In the tutorial below, you’ll see step-by-step how to erase all data from your iPhone and remove it from your Apple account before selling it.
Before erasing all data from your iPhone, make sure your data is saved to your iCloud account, or that you have a recent backup of the device.
Table of Contents
How to Perform a Complete iCloud Backup of Your iPhone Data
Follow the steps below to perform a full iCloud backup of your iPhone data:
1. Open the Settings app, then tap on your Apple account at the top (where your account name and profile picture appear).
2. Tap on “iCloud,” then go to “iCloud Backup.”
3. In the “iCloud Backup” options, ensure that backup for your device is enabled, then tap on “Back Up Now.”
You’ll need to wait for the backup process to complete. Depending on the amount of data on your device, this could take several minutes. It’s also recommended that your device be connected to a Wi-Fi network to speed up the upload process and to avoid potential costs if you don’t have unlimited mobile data.
It’s very important to know that if you’ve saved photos, contacts, calendar, notes, or files to iCloud, you don’t need to delete them manually. Manually deleting these will also remove them from your iCloud account and from other devices synced with your Apple account.
In addition to the full device backup, ensure that apps like Photos, Notes, Contacts, Calendar, and others are synced with iCloud and that the synchronization is complete. Check this by going to: Settings > Your Apple Account > iCloud > “Saved to iCloud.”
Disable “Stolen Device Protection” and “Find My”
Stolen Device Protection is a security feature from Apple that makes your iPhone much harder to use if lost or stolen. Once activated, it makes the device practically useless to anyone who doesn’t have access to your iCloud account and its associated password.
If you have this security feature enabled, you need to disable it before removing the iPhone from your Apple account. It’s very likely that you’ll need to wait for about an hour for this feature to deactivate. Additionally, you must disable the “Find My” feature.
Unpair Your Apple Watch from Your iPhone
If you have an Apple Watch paired with the iPhone you plan to give to someone else, it’s recommended to unpair the watch. To unpair your Apple Watch from your iPhone, follow the tutorial below:
After completing a full backup of your data and unpairing your Apple Watch, you can remove the iPhone from your Apple account. During this process, all data on the device will be erased, and it will be ready to connect to another Apple account for the new owner.
How to Remove an iPhone from Your Apple Account Before Selling It
To remove your iPhone from your Apple account before selling or giving it to someone else, follow the steps below:
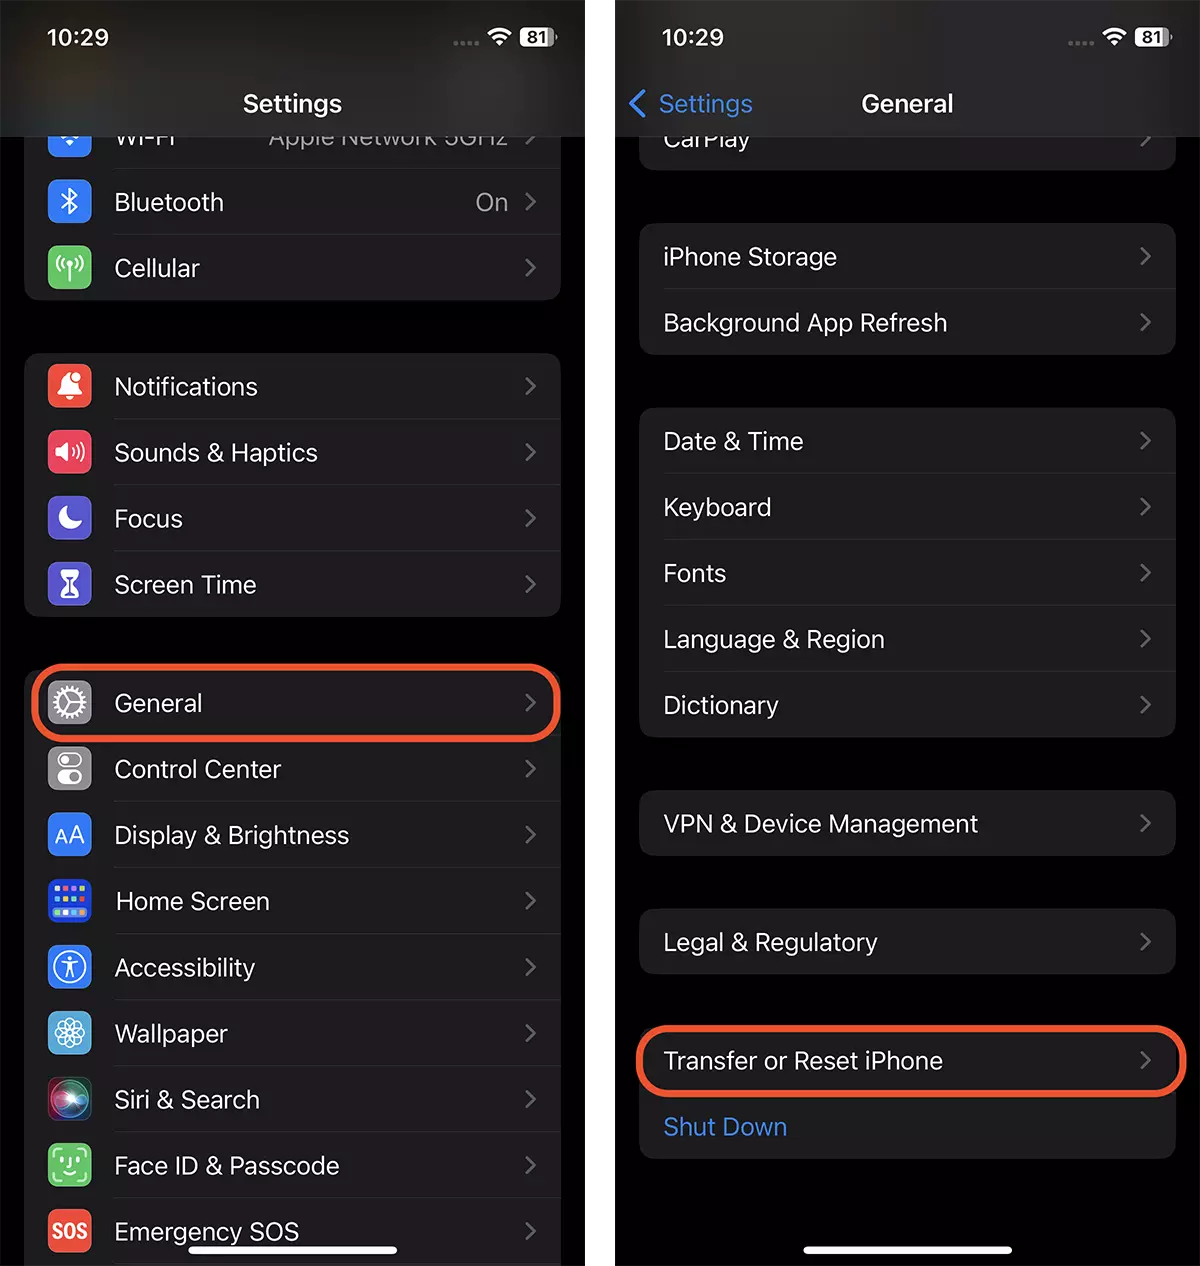
1. Open the Settings app on your iPhone, then go to General Settings: “Settings > General.”
2. In the general settings list, scroll to the bottom and tap on “Transfer or Reset iPhone.”
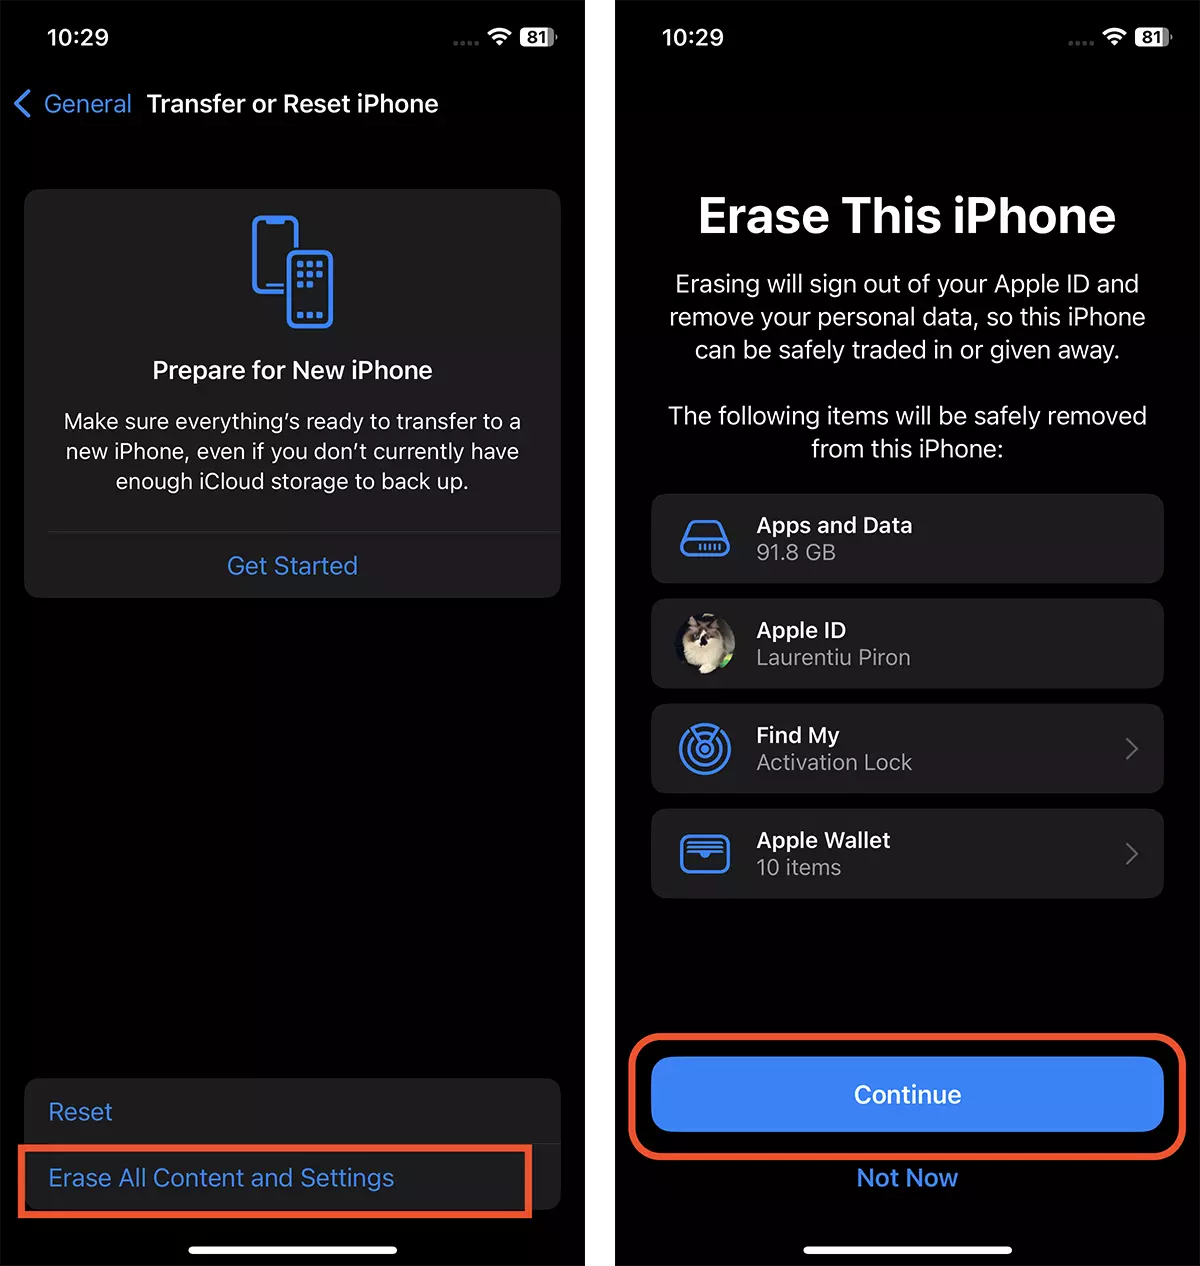
3. Tap on the option to erase all content and settings: “Erase All Content and Settings.”
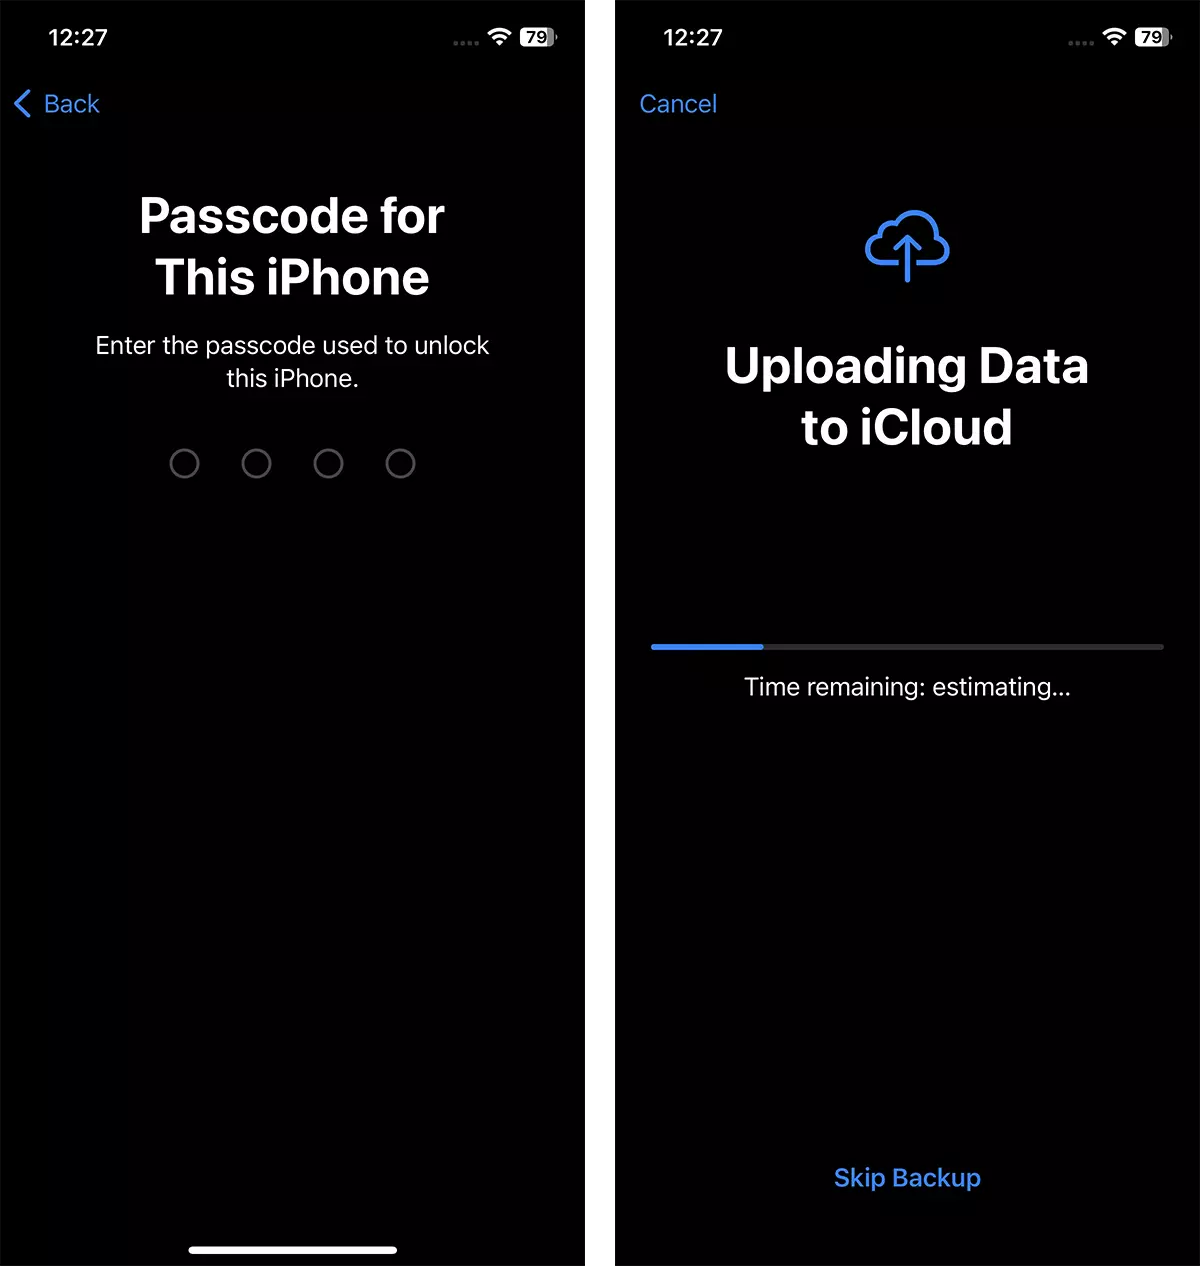
4. You will then be prompted to enter your device’s unlock password and the password for the Apple account currently signed in on the device.
After this step, you will have successfully removed the iPhone from your Apple account. All apps and data saved on the device, your Apple account, saved bank cards in the Wallet app or other apps, and the eSIM profile from your mobile carrier will be erased.