In this tutorial you will see how to set up custom email domains on iCloud Email , what are the limitations of this service Custom Email Domain in iCloud+ and what password must be used by each email address created on iCloud Mail
Starting from June 2021, Apple enter the service iCloud+ for users with abonamente iCloud. The new service comes with several new options, among them Private Relay, Hide My Mail si Custom Email Domains. The latter service allows subscribers iCloud+ to add a custom email domain in iCloud Mail. E-mail domain that you can share with family members and that you can create up to 3 e-mail addresses for each user in the family group.
Table of Contents
Features and Limitations Custom Email Domain / personalized email domains on iCloud Email
Before you see how to set up custom email domains on iCloud Mail, you should know that there are some limitations.
1. You can add up to 5 internet domains to use for email. Personalized e-mail domains can be used either only by the organizer or together with family members (users in the Family group). This means that each family member can have up to three e-mail addresses on each custom domain added. The Family limit is five members plus the organizer.
2. Email addresses added to the custom domain they cannot have different passwords. In the scenario where you add the custom e-mail domain example.com in iCloud Mail, and on it you create the e-mail addresses: [email protected] si [email protected], for both accounts the access password will be the same from Apple id. They will have a common inbox iCloud Mail. However, we can choose from which address we want to send e-mail messages.
3. When you add an e-mail address on a personalized domain for family members, they will each log in with their own password iCloud / Apple ID. Still without the possibility to change the password at the personalized e-mail address.
4. New email addresses created on custom domains will be able to be used for FaceTime, Messages, Calendar and the rest of the services Apple.
5. The new e-mail addresses created on the custom domain in iCloud Mail can be added to email clients/applications such as: Microsoft Outlook, Windows Mail, Mozilla Thunderbird and others.
6. It will not be possible to set separate signature for each e-mail address.
7. If you are wondering how much storage space you have available for each email address added in iCloud Email, all you have to do is look at how much storage space you still have available in your account iCloud+. That is the shared storage used by Photos, iCloud Drive, iCloud Mail and other applications Apple or third parties, who have access to iCloud Storage.
So Custom Email Domain or custom email domains on iCloud Mail should not be seen as an email hosting service provided by Apple subscribers iCloud+. Custom Email Domain is more of a service alias email through which users can add their own internet domains to use for receiving and sending e-mail messages. All closely related to Apple ID.
It is not recommended to use this service for an internet domain on which you have already created e-mail addresses for several users. They will not be able to have their own account passwords iCloud Mail. Except in case you have iCloud+ cu Family Sharing and all users are in this group.
How to set up custom email domains on iCloud Email
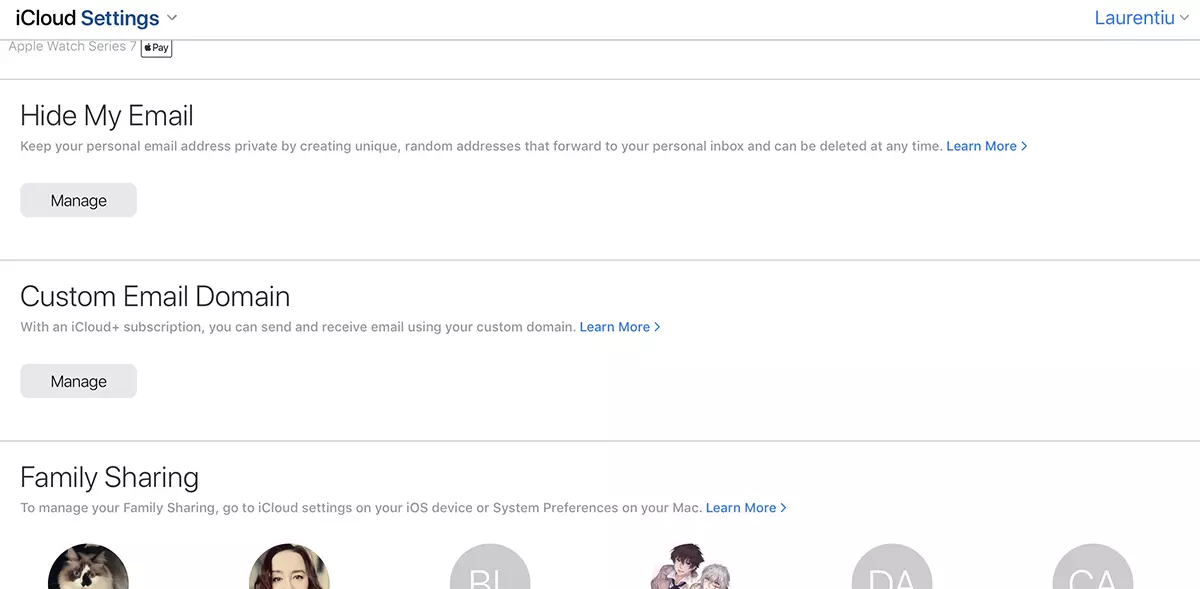
1. Open in the browser iCloud. Com /settings and go to Custom Email Domain → Manage.
2. You choose whether the new domain you add for e-mail can be used only by you or by family members.
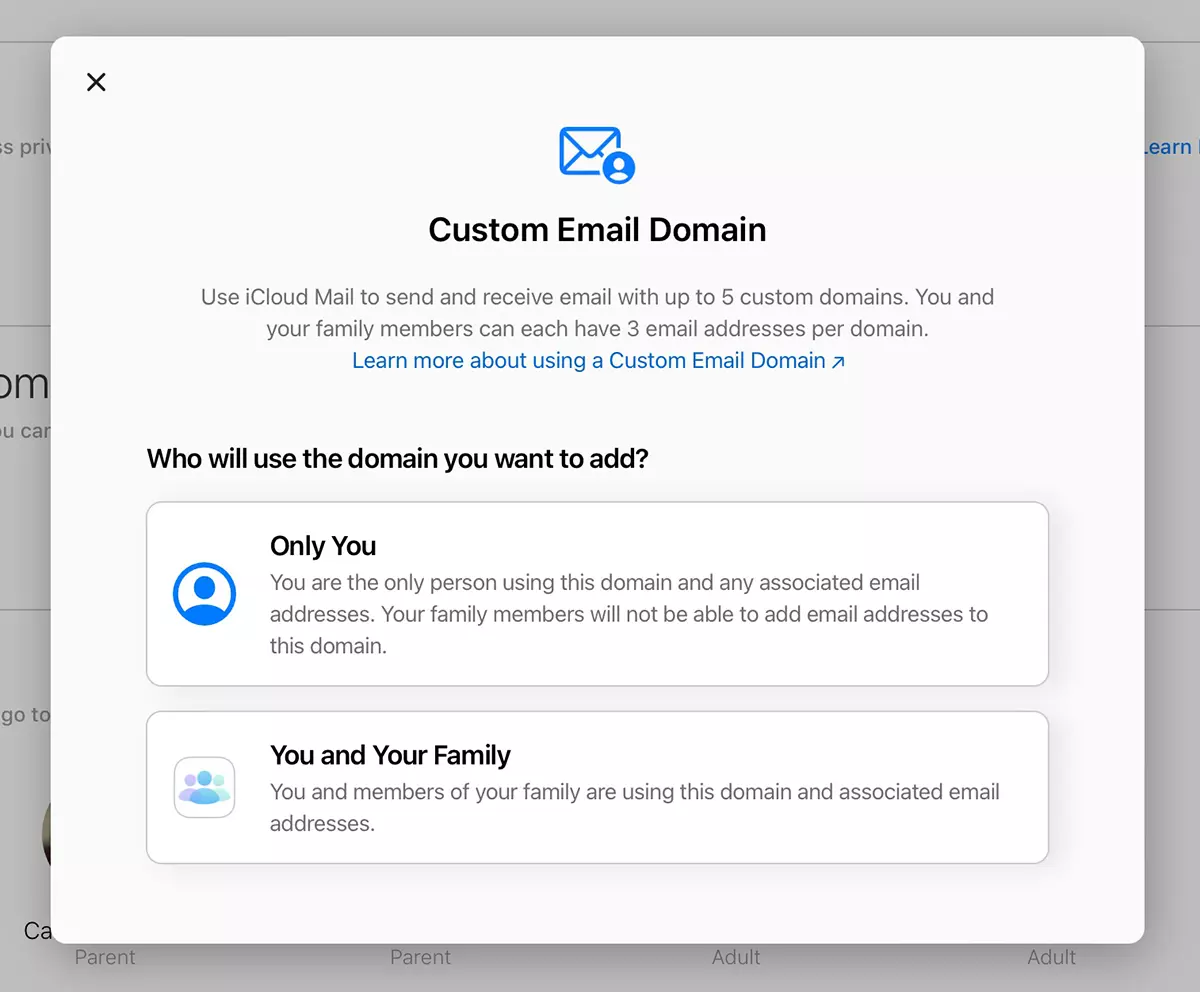
Since it is a very personal internet domain, I chose "Only You” for this tutorial.
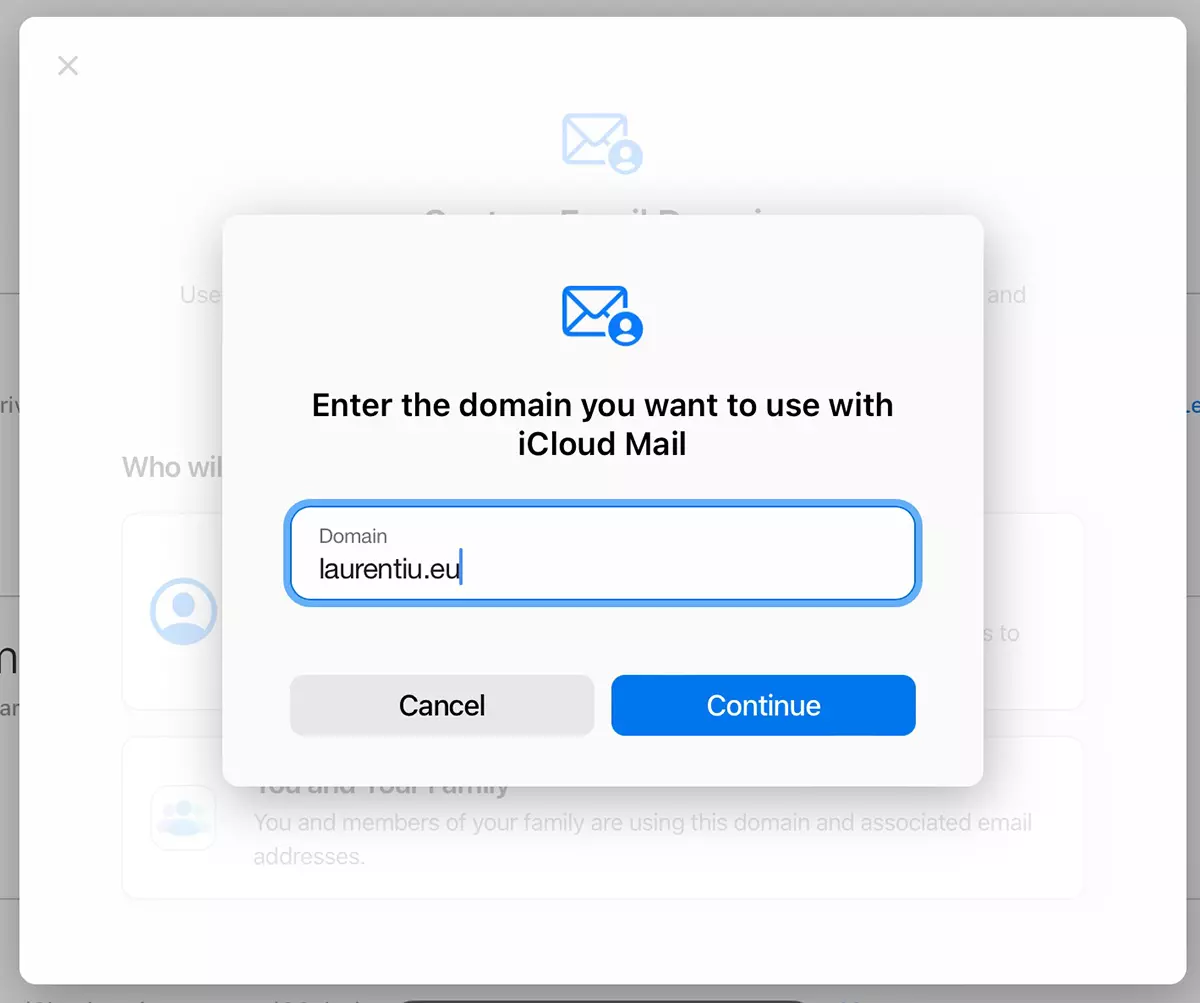
3. In the next step, we enter the domain we want to use with iCloud Mail laurentiu.eu, in my case.
4. We add the e-mail address that we want to use on the added domain. Here we have to be a little careful. If we already have an e-mail account on the added domain, enter the existing e-mail address. “Add email address”.
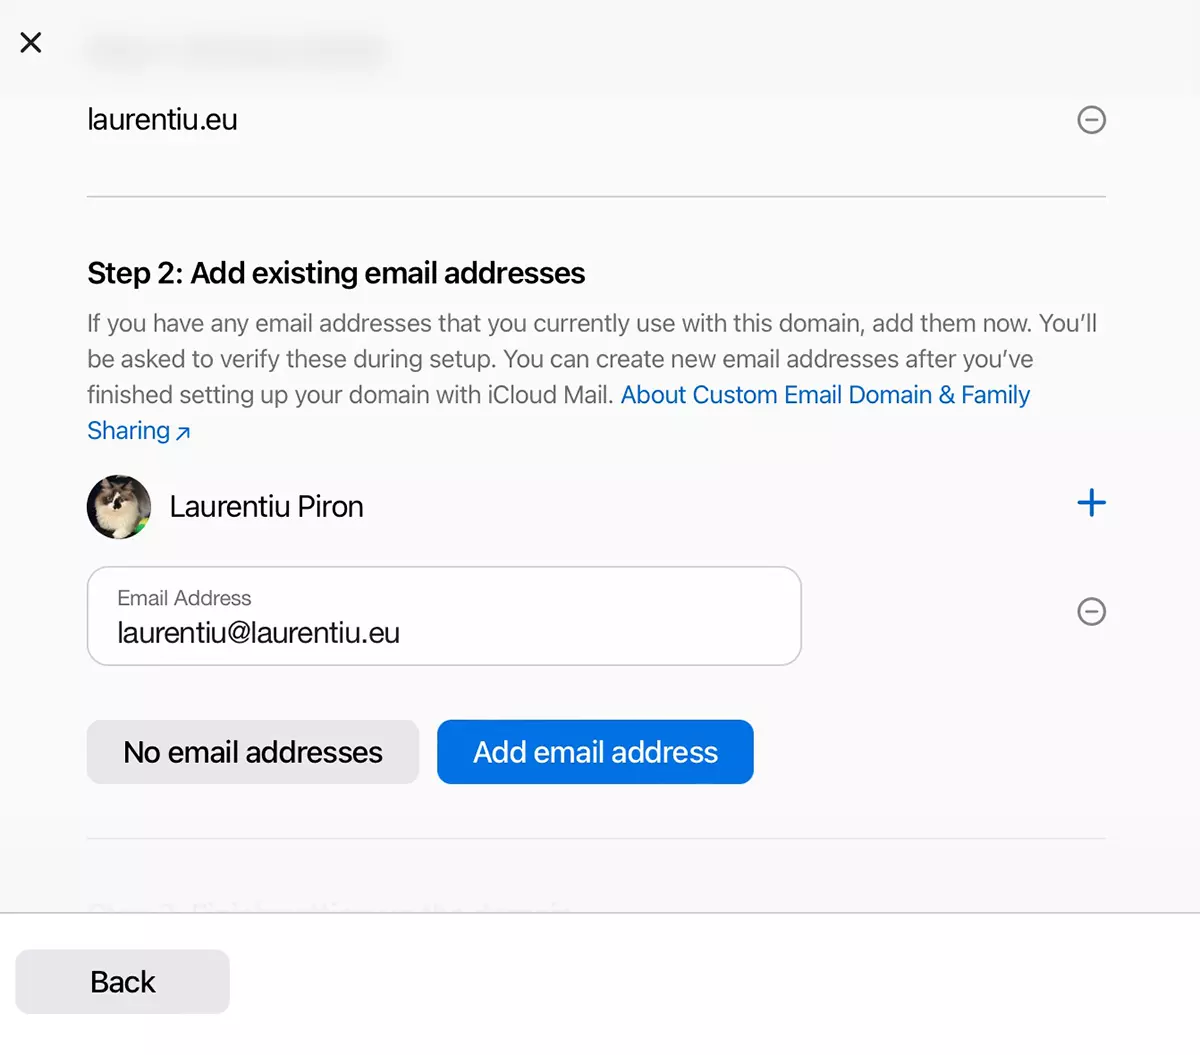
If you have not already created an e-mail address on the domain, choose "No email address".
5. In the next step, you will need to confirm the e-mail address added in iCloud Mail. If the address is already used on another email hosting service, go to your email account and copy the verification code. Do the validation in iCloud Mail
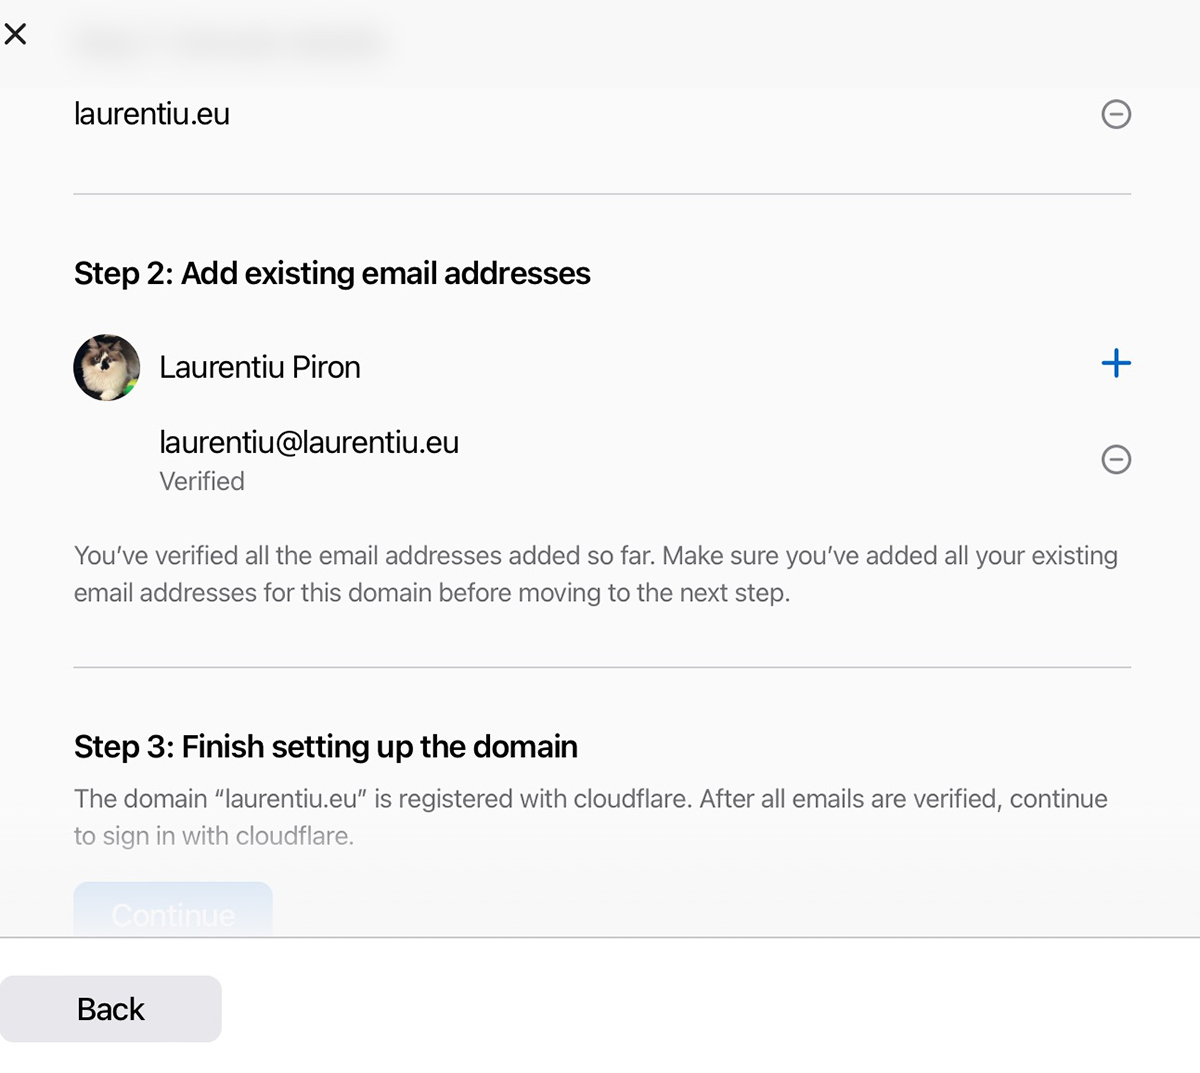
6. If for the added domain you have Cloudflare ca DNS manager, then it is best to open another tab in the browser and log in to the account Cloudflare. Return to the tab in which you configure the personalized e-mail domain in iCloud Mail, then click on "Continue" from “Finish setting up the domain“.
The new DNS zones for e-mail will be updated in Cloudflare.
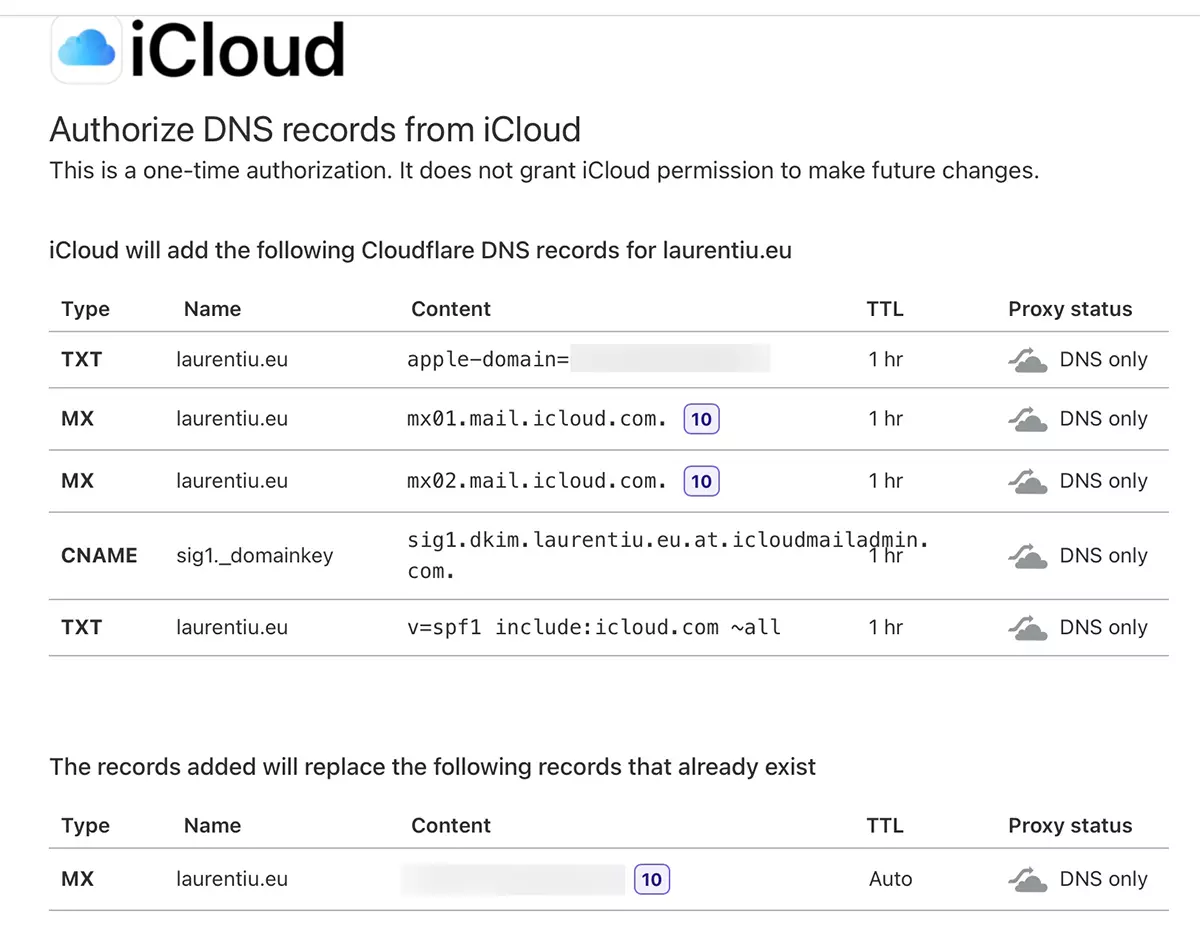
If you don't use Cloudflare, go to the manager DNS of the domain added in iCloud Mail and set the new coordinates there MX, TXT si CNAME (for DKIM).
After this step, your email address will no longer be available on the old server. The old messages will remain there, but they will no longer be accessible. New messages received will enter on iCloud Mail
Next, we can choose for the newly created address to be used as the default address for sending messages from iCloud Mail and at the same time this can be used as Apple ID.
In this way, custom e-mail domains are added and configured on iCloud Mail
Custom email domains on iCloud Mail does not affect the existing websites on these domains. As we know, the email server does not necessarily have to be the same as the website hosting server. This is not even indicated.