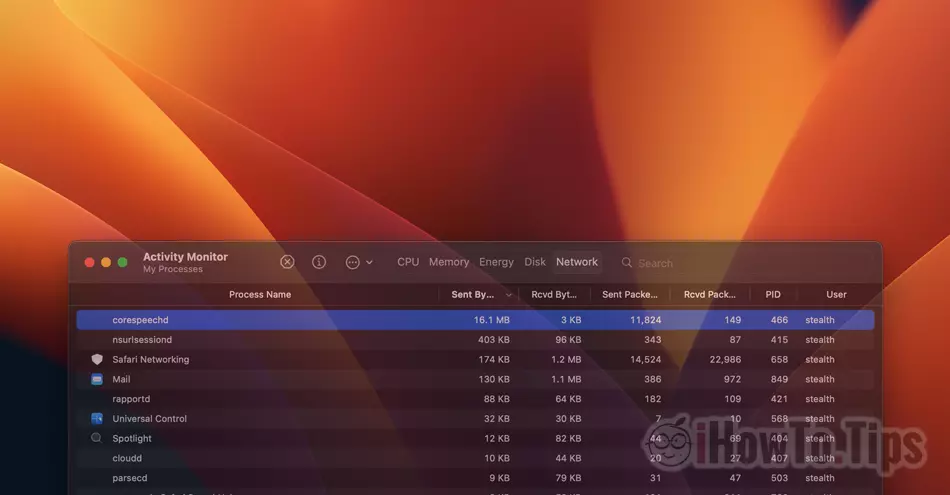
When corespeechd uses CPU and Network excessively on macOS, the first signs that appear are the noise produced by the cooling system of Mac (cooler CPU fan) and making work processes more difficult. MacBook or Mac it starts to run harder and harder.
If you face problems related to the process corespeechd, whether it uses large processor resources or transfers a large volume of data, before taking measures, it is good to know what this process is. What is the role corespeechd on the operating system macOS.
Table of Contents
What is a corespeechd?
It is good to know that the process corespeechd it is not part of an application and not a virus, but is a system process that runs in the background to make possible the function by which selected texts can be read aloud (voice) on macOS. It fulfills the function text-to-voice.
So corespeechd is a daemon al macOS, designed primarily for people with disabilities, who have vision or mobility problems. These people can have access to the text content in an easier and more accessible way.
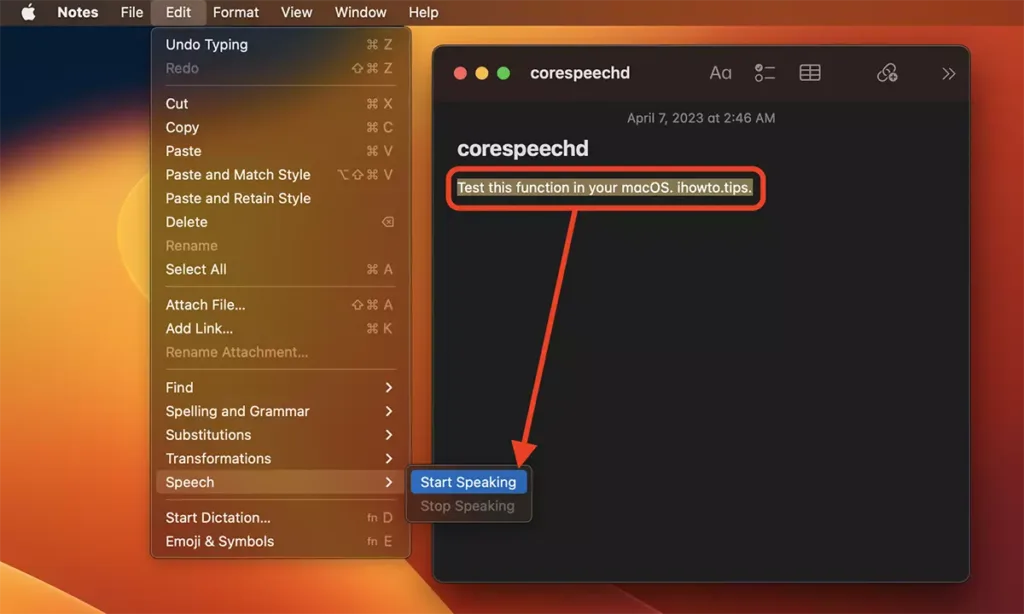
This whole process is also responsible for accessibility VoiceOver, which visually impaired personnel use to navigate more easily in the menus and applications of the operating system.
You might also be interested processes: bird, UFVSService, photoanalysisd:
- The process bird uses high CPU resources on Mac – How To Fix
- What is a UVFSService and why it uses large CPU resources
- What is a photoanalysisd and why it uses a lot of CPU resources on Mac
The scenarios in which corespeechd uses CPU and Network excessively, they are closely related to the voice assistance function a macOS.
corespeechd uses CPU and Network – How to Fix
if the corespeechd uses CPU and Network, first of all, it has to be time. It is possible to update its database (so use the network) or CPU, when it is initialized for the first time.
However, there can also be errors corespeechd to maintain a high CPU usage. In this case, follow the steps below to reduce CPU usage and Network this daemon macOS.
1. Disable System Integrity Protection (SIP) - here is the tutorial to disable SIP).
Careful! Disabling SIP will allow the administrator user to make changes to the system files (kernel) macOS.
2. Restart your Mac.
3. Open the Terminal utility and execute the following commands:
sudo mount -uw /
sudo killall Finder
Order “sudo mount -uw /" on macOS mounts the main file system ("/") in read-write mode and allows users with administrator permissions to make changes to the system. "-uw" are options for the order "mount". "-u" means "unmount” (unmount) the file system before trying to mount it. "-w” means that the file system is mounted in read-write mode (read-write), which allows users with administrator permissions to make changes in the system.
Order “sudo killall Finder” restart Finder.
4. Rename the file “com.apple.corespeechd.plist” from the location “/System/Library/LaunchAgents/”.
cd /System/Library/LaunchAgents/
sudo mv com.apple.corespeechd.plist com.apple.corespeechd.plist.bak
5. Activate System Integrity Protection in place.
6. Restart your Mac.
After this change, the process corespeechd uses CPU and Network in normal parameters.